Git-LFS under the hood
When working with Git, you should know that cloning a repository will give you a full copy of nearly all the data that the server has.
This includes every version of every file in the repository.
Although Git does a fantastic job when it comes to storing files efficiently, this is not the case for binary files.
So... what happens when you store binary files (e.g., media files) in your repository?
How does Git even handle the versioning of such files? And what does your current setup do under the hood?
Let's take a look by simulating those scenarios in a test environment!
Why bother?
Since Git does in fact retrieve a full copy of your repository you might have already guessed that this can be especially problematic when
cloning a repository with many binary files that are changed frequently (e.g., large game assets like sprites, audio samples,.etc.).
Using git-lfs solves this problem and reduces your repository size while also speeding up the clone time.
Sounds great, right? Let's see how this works in practice.
How does git-lfs work?
To get an idea of how Git LFS works under the hood, we can install the lfs-test-server and use it as the LFS server for our GitHub test repository.
If you want to follow along or want to know how you can set up a LFS test server, feel free to read the Appendix section where the configuration is described.
Since we now have a local LFS server for testing purposes, we can start configuring our test repository to use it.
For this, we can create the following .lfsconfig file, add it to our repository, and run git lfs install to initialize Git LFS for our repository.
    [lfs]
      url = "https://localhost:9999/"

    [http]
      sslverify = false
For testing, I added the git-lfs-linux-adm64-v3.4.0.tar.gz file to my repository and tracked it with Git LFS using git lfs track "*.tar.gz".
This creates a .gitattributes file with the following content:
*.tar.gz filter=lfs diff=lfs merge=lfs -text
Ensure that this file is also added to your repository, so that collaborators also track *.tar.gz files in the same way.
Git LFS also comes with a file locking API for collaboration, but I deactivated it for simplicity with the following command:
git config lfs.https://localhost:8080/.locksverify false
At this point, we have configured git to use our local LFS test server, configured tracking for *.tar.gz files, added the .gitattributes file generated by Git LFS
to our repository, and also added git-lfs-linux-adm64-v3.4.0.tar.gz to test our setup.
Once we commit and push those files to our remote server, we can see the following output:
    Uploading LFS objects: 100% (1/1), 4.1 MB | 0 B/s, done.
    Objekte aufzählen: 5, fertig.
    Zähle Objekte: 100% (5/5), fertig.
    Delta-Kompression verwendet bis zu 12 Threads.
    Komprimiere Objekte: 100% (4/4), fertig.
    Schreibe Objekte: 100% (5/5), 541 Bytes | 541.00 KiB/s, fertig.
    Gesamt 5 (Delta 0), Wiederverwendet 0 (Delta 0), Pack wiederverwendet 0
The first line indicates that our LFS object was successfully uploaded. We can verify that by navigating to the management UI of our test server:
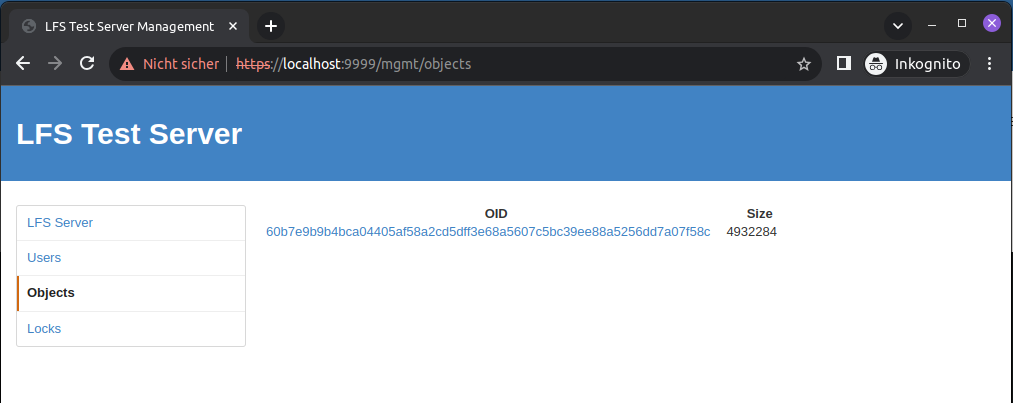
So... if the file is stored on the LFS... what is stored on the remote server?
This is where the pointer files come into play:
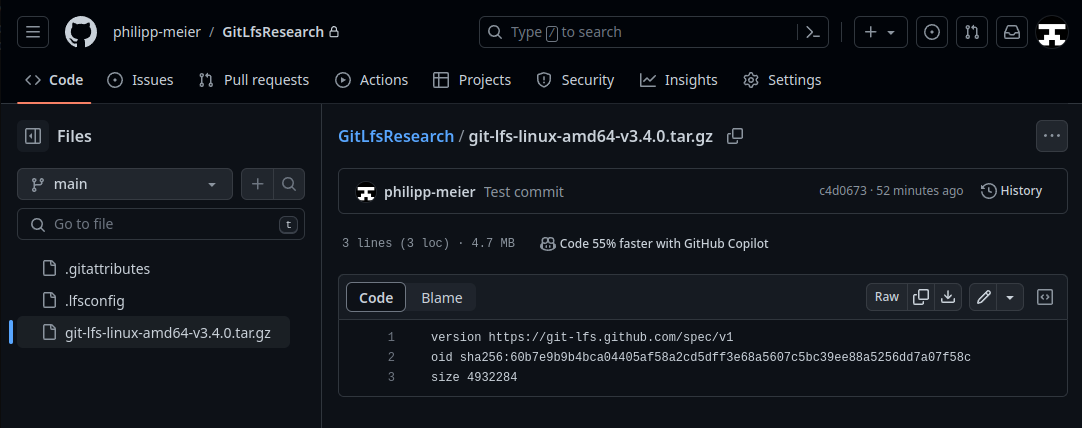
(The tar.gz file is a text file on our remote server.)
The remote server only knows the name of the file through the text file, which points to the actual file and can be resolved on the client side via Git LFS.
You can find the actual binary file in the .git/lfs/objects/../..-folder, as the pointer suggests:

To make this a bit more interesting, I changed our .tar.gz file by unpacking it and removing some files.
After committing and pushing the changed file, we can see the following output again:
    Uploading LFS objects: 100% (1/1), 4.8 MB | 0 B/s, done.
    Objekte aufzählen: 9, fertig.
    Zähle Objekte: 100% (9/9), fertig.
    Delta-Kompression verwendet bis zu 12 Threads.
    Komprimiere Objekte: 100% (7/7), fertig.
    Schreibe Objekte: 100% (7/7), 3.22 KiB | 3.22 MiB/s, fertig.
    Gesamt 7 (Delta 0), Wiederverwendet 0 (Delta 0), Pack wiederverwendet 0
...and a second file appears on our test server:
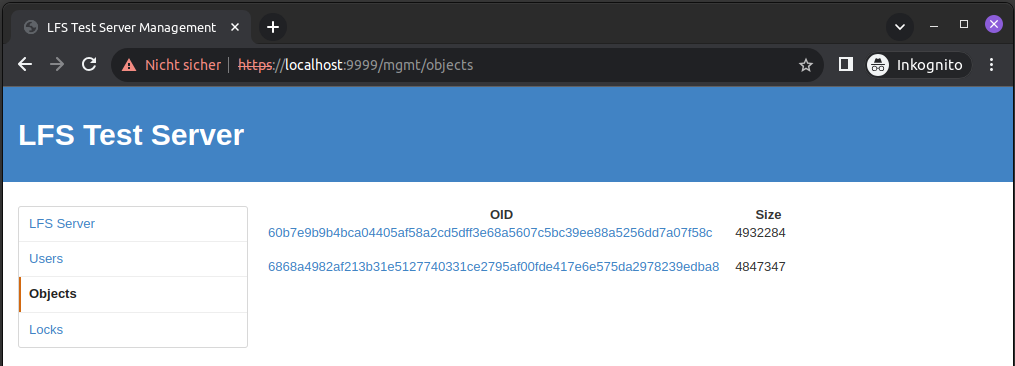
If we switch to GitHub, we also see that the main branch now points to the new version of the file, as expected:
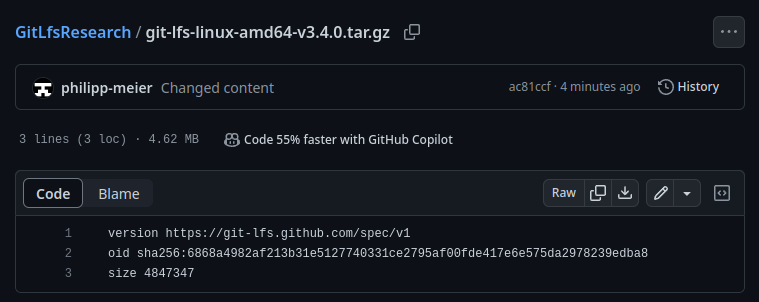
Since we had both versions of the tar.gz file in our local environment, we can find both of them in our lfs objects folder:

So... what's the benefit in this case?
If we clone the test repository again, we will notice that we only receive the most recent version of our tar.gz file without having to download all previous versions of this file again:

If we want to take this further, we can even verify that our remote server never stored this file by cloning the repository again without having LFS configured.
This would give us all the files, except the binary files:
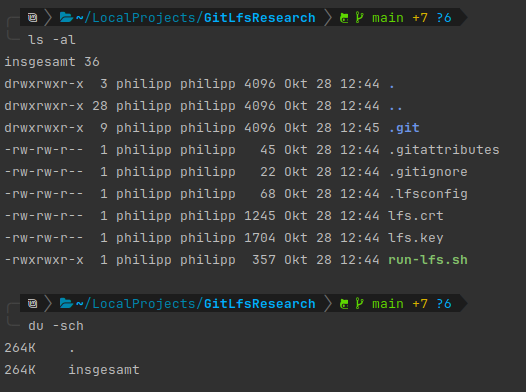
Let's say we want to have the previous version of the file. What can we do?
One option would be to simply checkout the previous state of the main branch. Git LFS takes care of getting the previous file for you using the pointer file.
After that, you can see that you have both versions locally available again:

To sum up, Git LFS makes use of the smudge and clean filters of Git. Those filters allow git-lfs to change a file on checkout (smudge) and on commit (clean).
This enables Git LFS to "replace" the binary file with a pointer file for your remote server while simultaneously sending the binary file to your LFS server.
When using git checkout, Git LFS intercepts Git via the smudge filter again and replaces the pointer file with the actual file by requesting it from the storage server.
In short
With Git LFS, you will get large files from an external data source on-demand instead of getting every version of every (binary) file all the time.
If you are interested in how exactly Git LFS makes use of smudge and clean, you can find a detailed explanation in
the official git-lfs client specification.
Thanks for reading!
Appendix
Setting up the local LFS test server
Setting up the test server is fairly easy. If you want to follow along, you can do it with the following steps:
- Install git-lfs by following the instructions on their page for your OS.
- Install Go(Lang) as described here.
- Install the lfs-test-server with
go install github.com/git-lfs/lfs-test-server@latest. - Generate a cert with
openssl req -x509 -sha256 -nodes -days 2100 -newkey rsa:2048 -keyout lfs.key -out lfs.crt - Create a
run-lfs.shscript to configure and run the server as described below. - Run
chmod +x run-lfs.shand execute the run-script in order to start the local lfs test server.
run-lfs.sh
    #!/bin/bash

    set -eu
    set -o pipefail


    LFS_LISTEN="tcp://:9999"
    LFS_HOST="127.0.0.1:9999"
    LFS_CONTENTPATH="content"
    LFS_ADMINUSER="admin"
    LFS_ADMINPASS="password"
    LFS_CERT="lfs.crt"
    LFS_KEY="lfs.key"
    LFS_SCHEME="https"

    export LFS_LISTEN LFS_HOST LFS_CONTENTPATH LFS_ADMINUSER LFS_ADMINPASS LFS_CERT LFS_KEY LFS_SCHEME

    # Needs to be adapted ;)
    /home/philipp/go/bin/lfs-test-server
Once this is done, you can access the management UI via https://localhost:9999/mgmt/objects.
Analyzing and migrating repositories
If you are not sure if you have a problem with large files, you can analyze your repository with the git-sizer tool.
There are also tools that help you remove large files entirely (including the history) that you can check out: bfg-repo-cleaner, git-filter-repo
Git LFS also comes with a git lfs migrate command that is pretty useful.
Large files on GitHub
GitHub blocks files larger than 100 MiB and only allows adding files up to 25 MiB through the browser.
If you want to store larger files, you would have to use Git LFS.
GitHub also recommends distributing huge files via GitHub releases if necessary, whereby each file must be smaller than 2 GiB.
If you are planning to use GitHub's LFS, please ensure you read about the quota for your subscription plan.
Also, be aware that GitHub has no way of deleting remote Git LFS objects except by deleting the whole repository.
Sources / relevant links: